
 |
| images from the incredible online Worth & Mainbocher exhibit from the Museum of the City of New York. |

I wanted to feature this fabric, so after some fussing around, I decided to make the drape and the train out of it. The underskirt was a bronze-y colored silk skirt from a previous costume. I removed the ruffle from that skirt and used some of that fabric and a few remaining scraps to create the bodice.
The Drape
I started by drafting the drape. This was my very first draped pattern, so I was very nervous. It took a while and I had to study the reference photos very carefully (luckily the exhibit features and incredible zoom function). In the end, I settled on this. From the back, it looks very strange, but I knew it would always be covered by the train.


 |
| back drape diagram |
 |
| front drape diagram |
Here are some shots of the finished drape. Notice that I left the selvage edge unhemmed as an homage to Worth (also plus because lazy).


The Train
Then I used Truly Victorian's Butterfly Train pattern to finish the bustled skirt. I was running a little short of the embroidered silk, so I made the following changes to the pattern:
- Narrowing the train by omitting the side panels.
- Choosing the shortest pattern length and shortening that by an extra 9"
This train using hooks and eyes to attach to the garment, and it took a little trial and error to figure out where out them. The website suggests that the train is hooked to the outside of the bodice (this is not confirmed in the sample photo) and the written directions suggest hooking the train to an underskirt (which is what I started with). Hooking the train to a skirt worked fine while I was working on the dress form, but I eventually hooked the train to the inside of my bodice. More on that decision later.
Here's the train hooked to the underskirt:


The Bodice (in which I do everything the hard way)
In theory, I used the Truly Victorian 1892 Ball Gown Bodice. I say "in theory" because I made some serious alterations to change the back closure from buttons to a laced closure, to accomodate the bustle, and to give the back of the bodice an elongated back point.

After the extensive changes I made to the bodice, I came to realize that all of the Truly Victorian ball gown bodices are all essentially the same pattern. If you are going to have to make big changes to the pattern or if you are going to have a sleeveless gown, it really doesn't matter which pattern you choose. All these patterns are the same basic 5 pattern pieces. There are subtle differences for closures, neck lines, and bustles. You will save yourself a lot of time if you want something exactly like or very close to one of these designs, but if you are going to be making changes, I'm not sure it's going to matter which one you start with.
 |
| 1892 Ball Gown |
 |
| 1885 Bodice |
 |
| 1879 |
 |
| 1881 |
After making five ("yes, just the five") muslins to get the fit right, I was ready to make the final version. I followed this fantastic blog's advice about how to do a layered bodice. I started with the lining layer, and added the boning. I finished the top and bottom edges with bias binding before attaching the outer layer.


 |
| Interior of the Worth gown, for comparison |

This make sense if you are planning to tack ruched fabric to the lining before like this:

However, after much experimentation, I decided that the best option was to apply the outer layer directly to the lining.


In another ill-fated "sounded good at the time" idea, I thought I might need a little more seam allowance on the outer layer, so I added bias binding all the way around.
 |
| I figured that I might need a little extra seam allowance to deal with the added bulk from the boning on the lining layer and the muslin interlining on the outer layer. |
 |
| all bias binding, all the time |

This finish in consistent with the original that I was copying, but I'm not sure that makes me feel any better about it.

 |
| Also, in a fit of perverse drive for "period correctness", I decided to hand bind the button holes. |
Finally, the bodice layers were attached to each other, and I was ready to start thinking about trimming the bodice.


After many different test drapes, I settled on a gold colored silk gorgette to make just a front drape. I was initially enamored of the chevon shaped drape on the back of the original, but I found that I couldn't get the proportions right to be flattering because I am so short waisted.

I wanted to use some of the teal fabric on the bodice, so that they looked like they really belonged together. Lastly, I wanted to create some sort of pouf-of-interest to mimic the feather "thing" that sits at the lowest point of the front drape on the Worth gown.
I loosely followed this tutorial to make fabric "flowers" for the front of the bodice and the drape.


The last thing that I did was to make some trim from a contrasting brass fabric trimmed with tan lace. I pleated this fabric using the "fork trick" I found on the Truly Victorian website. I added this trim to the front of the underskirt and the lower portion of the train.


The full effect was truly achieved once I had it on at the World's Fair. I had friends help with the hair and make up. I have good and talented friends.
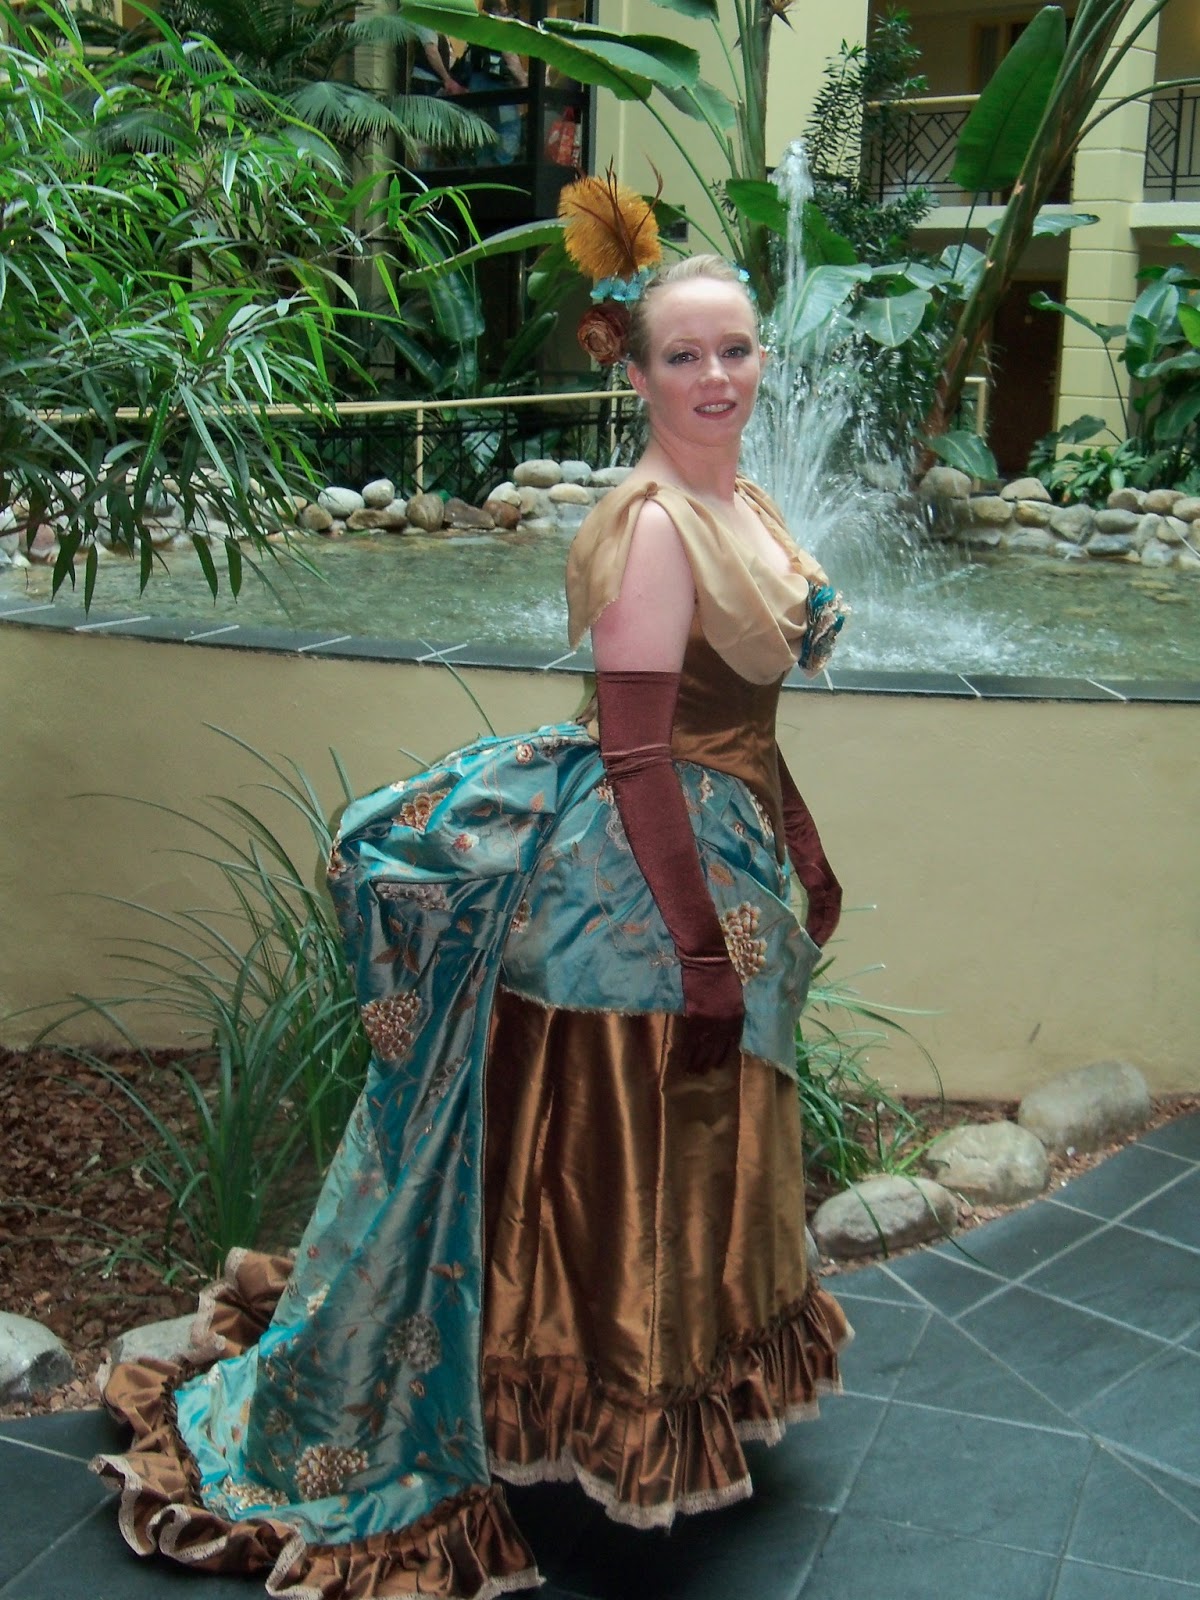


Finally, I was additionally motivated to complete this project in time for this event because Margaret (Magpie) Killjoy was going to be there making tintypes. You should really check out his stuff. It's amazing. We had seen his work at Steampunk Gettysburg, and I knew I really wanted one in a fabulous outfit. Here's what I got. I couldn't love it more:
 |
| Seriously. |


