Showing posts with label muslin. Show all posts

Wednesday, July 18, 2012

Laughing Moon Silverado Corset #3

Yesterday, I was worried about something that was completely outside of my control (it turned out fine). By design, I set aside all day yesterday for intensive corset sewing because is requires so much concentration that it crowds out worry. My mother says that my grandmother used to use sewing as a distraction from worry, so I'm carrying on a long tradition.

Yesterday I made some adjustments to the pattern and constructed a fully boned, single layer mock up for a final fitting. That was an astonishing success, so I was able to make final pattern adjustments and cut out and stitch together two layers of coutil for the final version. Whew!

I have also discovered two really excellent corset resources that I wanted to share. The first is the Foundations Revealed website. They have an incredible corset workshop pamphlet available for download that looks to be an insightful approach to drafting your own pattern or adjusting an existing one.

The second resource is Sidney Eileen's website, which is a good resource for costumers generally. More specifically, I'm really enjoying her tutorial on corset flossing.

Here are pictures from yesterday's marathon session:

raising the bust line

reducing 2" at the waist by taking in 1/8th" on four seams

TA DA!!! This is looking pretty good. The only non-seam boning I used can been seen in green (one bone over the hip and the second lacing support). There are a few last minor adjustments. I want to raise the bust line even higher (it's marked on the salmon scrap piece) and I needed to shorten the length in the front for comfort when seated (you can see the chalk line in this photo). 

One side flipped up due to the lacing arrangement, but that can be easily fixed. The only back adjustment I plan on making a smoothing out the little points at my shoulder blades. 


Further bust adjustments and marks for shortening the front. 


More TA DA!!! Two layers of coutil cut and sewn from the new pattern. I'm ready to add the waist stay and get this finished!

Monday, July 16, 2012

Laughing Moon Silverado Corset #2

Yesterday, I created a corset with partial boning out of some sturdier craft fabric. I also took the opportunity to insert the busk. That was both for practice and for fitting. The fabric I used is stretching some, but overall the fit was pretty good. I will
  • make a minor bust adjustment
  • take in the waist by 2" for waist reduction ( 1/8" decrease at the waist on all seams except sideback-to-back seam)
  • take in seams to adjust the fit at the center back
The next version will be a single layer, but fully boned, version in some heavy canvas. It's thicker than my coutil, so I'm hoping that it will approximate the feel of two layers of coutil fairly well.

Here are some photos of my progress:

tracing off pattern adjustments from the most recent round of fittings

Inserting the busk clasps into the gaps. I was afraid of this step, but it's really straightforward. 
I threaded some yarn trough the clasps so that I could keep them poking out through the gaps. It also gave me something to hang onto when I sewed around the outside of the busk. 
Not bad for my first time. 

The fit on the dress form was body glove perfect, but I squish a little bit more than my dress form,  so I added a few more alterations after I tried it on. 


I don't think I will actually place bone right over the bust point, but I needed to leave all the seams free incase I needed to make an adjustment. 


It stand away from my body somewhat at the center front. I fixed this somewhat with the bust adjustment, but this problem may persist due to the placement of the top of the busk. It holds the corset away from my body somewhat and I don't know how much I can correct for that. 

Sunday, July 15, 2012

Laughing Moon Silverado Corset #1

Whelp... this corset ain't gonna build itself.

Several years ago, I started a muslin for Laughing Moon's Silverado Corset Pattern. I got as far as tracing off the pattern, shortening the waist, cutting and sewing a muslin with no bones, and getting a first fitting. I have a vague memory of doing this on a craft day of long ago. Since then, the luslin has sat on a shelf waiting for me to order the corset hardware. Although I did not cut a size 8, I ordered the size 8 kit to get the shortest possible bones and busk.

I "borrowed" the following images from Farthingtales.ca because it shows the difference between the two corsets offered in this pattern:

The black corset is the Dore pattern and the pink corset is the Silverado pattern. The scuttlebutt on Victorian costuming site seems to be that the Dore version gives a more historically accurate "rounded bust line". I can see that, but I am interested in trying the Silverado for a few reasons.


  1. A stroll through Ageless Patterns' selection of period corset patterns shows an almost even split between patterns with and without bust gores. 
  2. Being so short waisted, I want to emphasize the distance between the bust point and my waist. The Silverado pattern does this well, using the bust gores to define and support the bust, instead of making a slow, smooth transition into the waist. 
  3. I'm hoping for more control over the fit in the bust. 
Yesterday, I did a second round of fitting on the muslin with no bones. I've traced off a new pattern with the changes. The next step will be to make another muslin out of sturdier fabric and try it with the busk, laces, and non-seam boning. This is likely to be the step where I will work on getting some waist reduction adjustments into the pattern. Right now the pattern is merely form fitting, but frankly, why bother with all the trouble of a corset if all you are going to get is one's same silhouette?

Monday, May 7, 2012

AP 1016 #3

Here are just some quick shots of the last muslin.
I think I've got a good fit in the back. 
The basque now lies smoothly over the bustle. 
It's still fitting down the front. Will need to make some minor changes to the collar.

Monday, April 9, 2012

Ageless Pattern 1016 #2


First off...
Check out this super sweet parasol I got in Gettysburg this weekend! It should be a perfect accessory for the mourning costume.
"Sometimes, even smiling make my face ache!"  - Frankenfurter

This weekend's progress
This weekend, I recopied the bodice pattern pieces so I would have a clean copy with last weekend's alterations. Then I decided to make a more complete muslin that would include everything but the non-functional trim. As I learned recently, it really pays to test the muslin with the sleeves. 

Ageless Patterns only come with the original pattern instructions. And it must be that in 1887, the base sewing knowledge must have been very different. Really, if you are an experienced sewer, the patterns can be reasoned through carefully, but in about every pattern, I have found something that stumps me for a while. 

In this pattern, it was the process of attaching the basque (the hip skirt/peplum-ish bit). The pattern says "Attach the Basque from #7 to #8. Insert the Basque underneath the sides and front. Attach to front from #9 to #10." I found these directions to be insufficient to my needs. After much fiddling, here is the more detailed set of directions I  came up with. 

Bodice without the basque. On the left is the center front false vest, on the left is the  edge of the postilion folded out. 

    Step 1: postilion on left, basque on right. Sew Basque to Back Postilion from #7 to #8
    Step 2: Iron the basque around the fold near #7 & #8
    Step 3: Clip the seam open at #6 about 5/8" to allow the bottom edge of the bodice to turn up.   
    Step 4: Fromt the outside, tuck the basque under the bodice edge and fold back over the postilion
    Step 5: Pin the basque to the bodice along bodice edge 
    Step 6: Clip horizontally to #9
    Step 7: From the outside, arrange the baque so that it overlaps the front smoothly & pin in place. Match #10 first.  
    Step 8: Sew from the clipped edge near #9 to #10. (view from the inside. Sorry about the overexposed pic.) 
    Step 9: Sew the Basque to the bodice. There will still be an opening near the postilion. This will have to be closed by hand later. You may also have a small gap at #9. Hopefully this can be covered by the revers. Finally, from the inside, tuck the basque under the postilion pleat and pin in place just to keep things tidy during the rest of the sewing. 
Other construction notes
The rest of the garment went together smoothly. Here are some pictures of the current muslin. There are some clear fitting problems on the dress form, but I need to try it on me before I get all worried. My shoulders and neck are different than the dress form's. I also need to try it on with the skirt. Right now, it looks like it's gapping in the weird way at my low back, but that room might be required by the GIGANTIC BUSTLE on this skirt. 


Friday, April 15, 2011

TV 423 Two-Toned Bodice (Airship hostess) Part 8

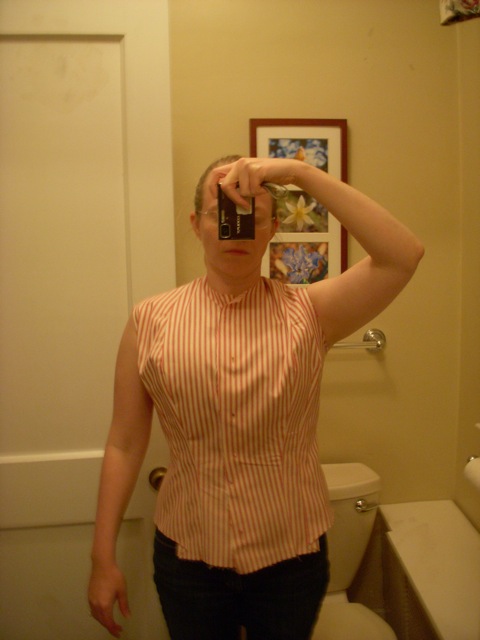
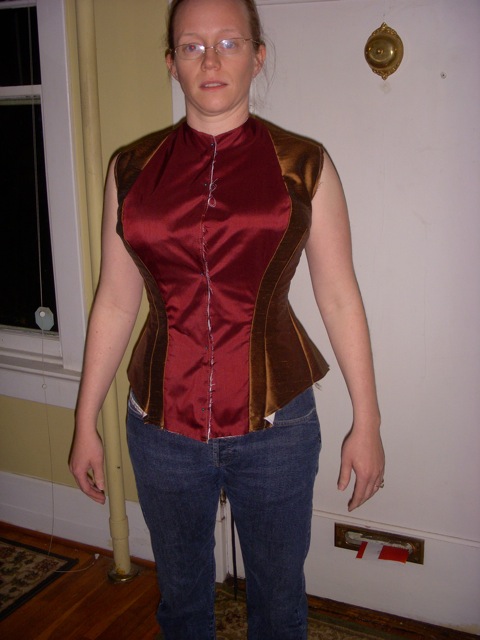
I tried on muslin 2.0 to check the fit. There is a lot more ease, but I wanted to test the fit with and without boning. I think I'm going to need most of this ease to accommodate the three layers + boning.

Front fit looks OK:

But there seems to be waaaaay too much room in the back peplum:


I did my best to pin out the excess between the side and side back pieces:

and rechecked the fit. things are looking better!


Then I pinned in the boning and called it a night:

Yesterday, I was in the DC area and I was lucky enough to be able to meet up with the other two air hostesses, Eugenia and Tracy (who, by the way, had a much better time with their initial fittings than I did). Eugenia helped me redistribute the back peplum more evenly and then we turned our attention to figuring out the sleeve.

Sleeve notes
The sleeve is designed to have a front side (the larger piece called the "outer sleeve") and a back side (the smaller piece called inner sleeve) rather than a more traditional top side and bottom side. The front or outer side is the sleeve piece that is most visible when you look at the garment from the front. The inner sleeve still sits mostly on the under side of the arm, but about 1/2 of the piece is visible from the back view of the garment.

To add to the confusion, the pattern pieces appear to have been printed in a non-standard way. I am used the to idea that, unless otherwise indicated, the pattern piece is printed from the righthand side view. You lay the pattern down over the front side of your fabric and if you only cut one layer, you have cut out the righthand side of that pattern piece.

There were not layout instructions with this pattern, so there was no indication I should expect anything different from this pattern. On closer inspection; however, it became obvious that one of the two sleeve pieces must have been printed from the lefthand side perspective. After about 15 minutes of thinking about it, we decided that the outer sleeve was printed from the lefthand perspective:

and that the inner sleeve was printed from the standard, righthand perspective:

This may have contributed to the rotation issues I had the first time I made the sleeve. I cut the muslin and Tracy was kind enough to help me pin fit it:


This is a much more natural fit then my first attempt. Hooray!

I noticed that the last fitting issue seemed to be som extra room in the side front piece. It turned out that both Tracy and Eugenia had had to make minor adjustments in the same area. Tracy pinned out the excess and I think I will be able to just fold this little extra out of the pattern and not have to rotate it into the seam, but we'll see when I take this apart.

I am feeling so much better about this project now. I think I'm ready to make changes to the pattern and start cutting out for the final version either today or Sunday.

Monday, April 4, 2011

TV 423 Two-Toned Bodice (Airship hostess) Part 3

... and we're back!
This weekend was a serious marathon sewing session. I can tell that it is going to take awhile to record it all. To pick up where I left off, I marked to tucks and adjustments on the muslin and then took it apart and traced those changes back onto my pattern. Here the muslin piece:


and here's the pattern piece over the muslin:

Moving the bust dart
The biggest challenge I've hit so far with the pattern was moving the bust dart that I had to fold in to make the last muslin lay smooth. I've seen people do this and it always looks like magic. I was nervous, so I went to the internet and found a few great sources. After reading and watching these sites, I felt ready to attempt is on my own:


1. start by copying the bust dart onto the pattern.


2. retrace the pattern piece incase something goes horribly wrong


3. cut out the bust dart


4. cut a line from one of the dart edges to the bust point, leaving a teensy, tiny hinge in the paper


5. close the bust dart by sliding the top part of the pattern down


This moved the shaping dart up into the shoulder princess seam. If this were a regular full bodice front, I would have had to open up a dart somewhere else to maintain the shaping.


The last thing I did isn't really a part of moving the dart, but I also needed to expand the center front to create enough room for the button overlap. First I just added it to the center front, but then I started to worry about the grainline. I decided to add the extra fabric into the seam instead.


Muslin 1.3
I cut out the side front and center front pieces again and reattached them to the muslin. Then I started to cackle like a mad scientist in a bad sci-fi movie. It's alive! Muaaahahahhha...


My plan worked! I was so excited I could hardly believe it.

Fitting the shoulders
As I have discussed before, my shoulder slope and width differ significantly from my dress form and I can see no good fix for that. At some point, I have to fit things on my own body. I tried the muslin on without the corset to check for major issues and the arm hole was set too far back for me. You can see the creases at the front of my shoulder. The shoulders are also too long. The shoulder should only extend about 5/8" past my shoulder point and in the photo you can see that I've got cute little cap sleeves.


I put the corset on and enlisted my DH to help redraw the armscye, pin fit the shoulder, and redraw the back neck. He's getting very good at this now. I'm very lucky to have his help!


I took the muslin apart and transferred the changes back to the pattern. Here are some action shots.

midway through crosshatching the shoulder seam


reminding myself that I had marked the new seam lines, but that I would still need to add a seam allowance


the shoulder seams after I removed the pins

armscye shifted forward:

tracing the adjustments back onto the pattern


When your patterns start to look like this, you know you just have to bite the bullet and retrace them:


Final construction begins!
I was finally ready to cut this out of my fashion fabric, interlining, and lining. I got really sick of cutting and sewing this pattern by the end of the night. For some pattern pieces, I have cut and sewn them 9 times.

I used a medium weight twill I had in my stash for the interlining. I was very happy with the way it behaved.

I had a moment of panic during construction. I thought I had miss cut the side back because it did not match the front shoulder:


It turned out, after I tried it on, that I had cut the side front too large in the shoulder. I was very glad to hear that because it was much faster to fix. I just cut off the extra bit on the front:


bodice construction notes
Here it is! I've decided not to bone the seams. It's going over a corset and the interlining appears to offer plenty of support. I might do boning if I didn't want to wear a corset or if I had interlined with a lightweight muslin. Fellow airship hostesses should take this into consideration.


I'll say it before anyone else does. Deanna Troy. I like the contrast fabric in the front. It says "Coffee? Tea? Me?" but I'll be covered from neck to wrists to ankle.

I cut out and installed the collar and lining late last night. I loathe collars. They never come out well. *sigh*. I was too tired last night to take more photos. Tomorrow I shall attempt the sleeves and cuffs. If all goes well, it should be done except for buttons. I will have to decide about those with the other airship hostesses so we have a uniform look.

Then on to accessories! (oh, and the skirt)