Laughing Moon Silverado Corset
I remade the Silverado corset from Laughing Moon again. I had more success this time than last time, but it still has some problems.
Things that went better this time:
I used this guide from the Truly Victorian website to help choose the size. The sizing guide on the LM pattern are vague, at best, and do not give any guidance about how to choose the right cup size for your desired waist size. I went with the size 10 and the C cup.
The other thing that I did well was that I did not try to shorten the waist at the waist itself. While that's what I have to do with most bodice patterns, then curves of a corset at so complicated at the waist, that it was easier to shorted that the top and bottom edges of the corset and adjust a few seams for shaping as needed.
That being said...
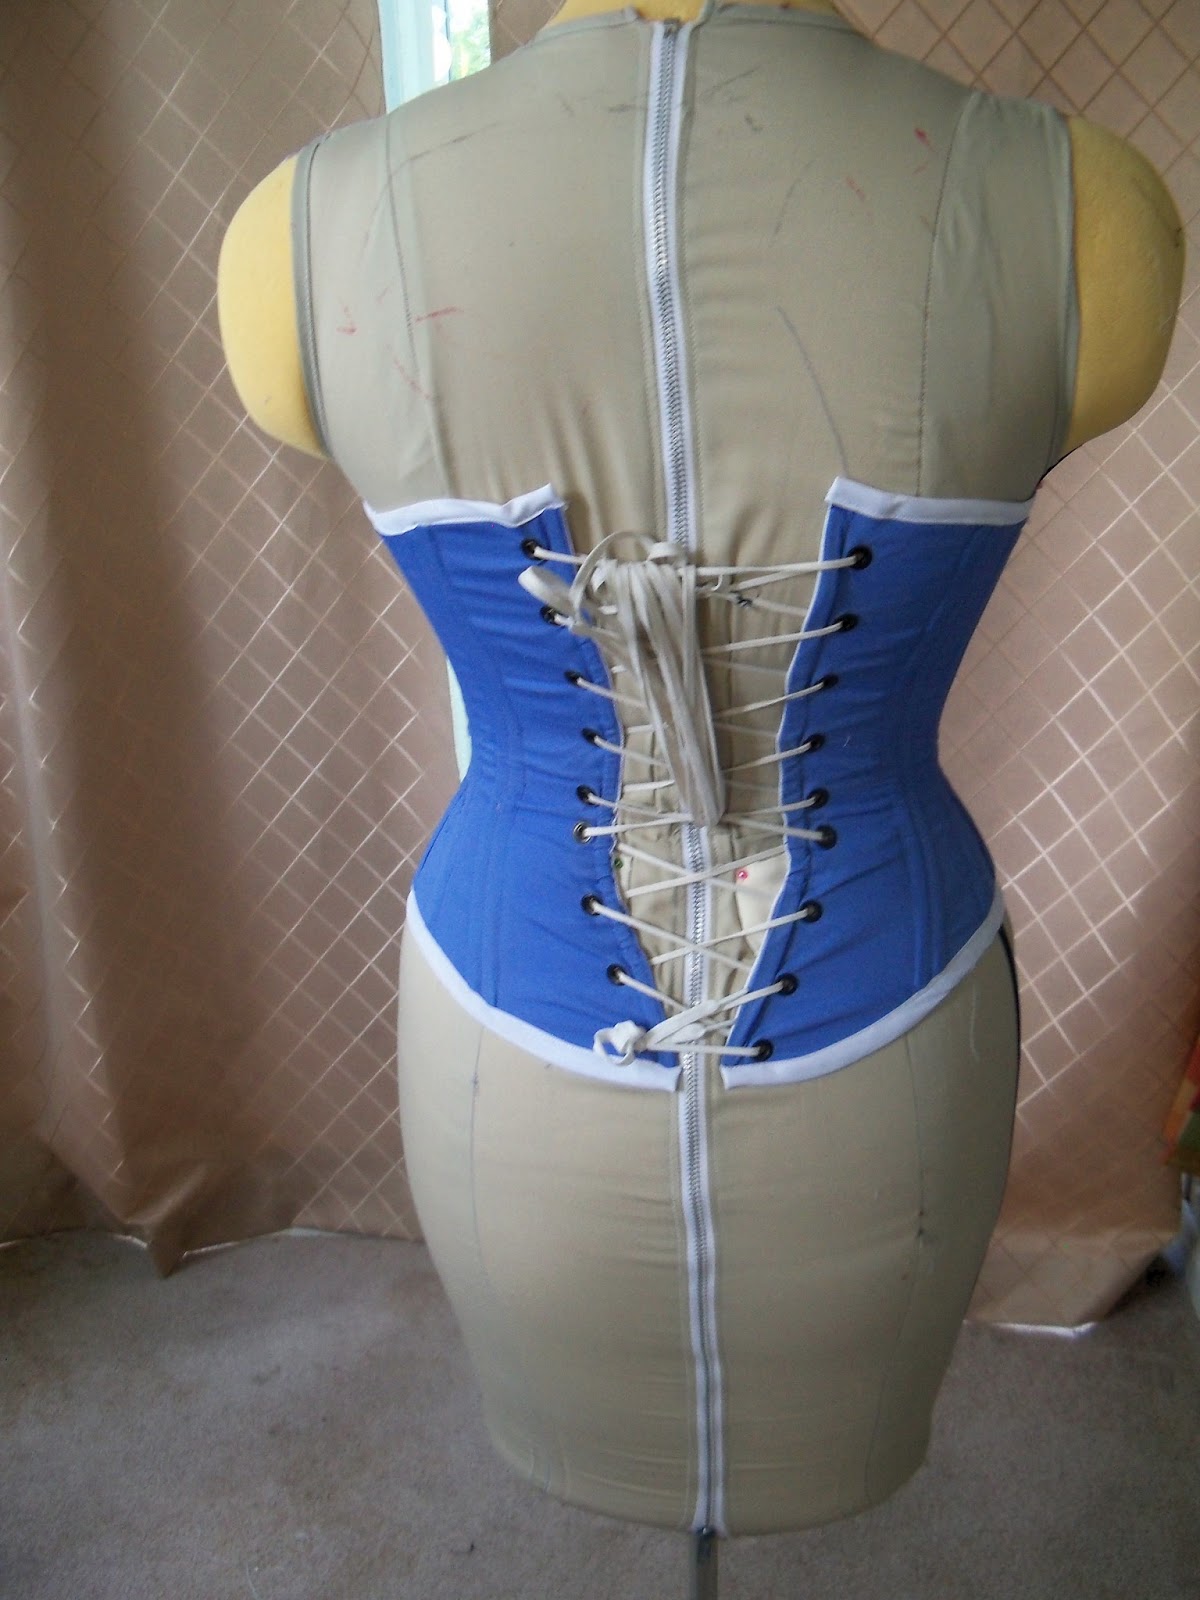
Things that did not go well this time:
I was working too fast under pressure. I did make two complete muslins, so the gap in the back was an almost even 2" all the way down. When I made the final version, I sewed the boning channel between the fashion fabric and the coutil instead of using the seam allowances of the coutil and boning casing as needed. While that's not the worst thing in the world, I was, as I said, working too fast. This meant that the seams on the coutil and the seams on the fashion fabric weren't perfectly aligned and as I sewed the boning channels I "ate up" a little fabric here and a little fabric there. By the time all of that sewing was done, the gap in the back was nowhere close to even and it was much wider than any muslin I had made.
As you can see from the photos, I still haven't figured out how to accommodate the shape of my low back. I have a lot of "squish" at my front and over my side hips, but almost none at my low back. This means that the laces meet at the low back and then, 2" up, the gap is too wide. I'll need to revisit this soon. This corset was wearable for this event, but it takes 5 minutes for someone else to lace it evenly. And, if it's not laced correctly, it's very painful to wear.
 |
| Good fit in the front, better bust support than that Ageless Patterns version I made. |
 |
| Side fit was also goo. I added a hip gusset for more side flare. |
 |
| Low back fit is a mess. |
Truly Victorian 163, the Grand Tournure
I am fascinated by the way the Victorians elided the female shape. Well, perhaps elided is too gentle term -- they obliterated it. Gigantic bustles played a big role in this, and I was excited to make a really large one.
It went together soothly, and I invested in some pricy hoop wire for this project. It's gorgeous stuff, but I think this pattern would still work well with the 3/8" poly tubing from the hardware store. The only thing you would need to watch out for would be changes in the overall length of the bustle due to the extra space that tubing requires.
This is also a dream to wear. The last wire ends above my knees, so getting into chairs is a fairly graceful manoeuvre. When seated, the bustle just collapses down -- easy!
 |
| Such prominence! |
 |
| I was a little disappointed with the width of the bustle cage. I have narrow hips, so I would have preferred something wider. |
 |
| I never put in a fixed closure on anything that goes around my waist, when I make costumes. This means that I get more life out of these garments, as I can easily adjust for a change in my size without resewing anything. |
Truly Victorian 170, Victorian Petticoats
I made view C of this pattern. It has the smooth front and flounced back with extra room for a bustle, which clearly, I was now going to need. The pattern went together easily. I chose to take the time to do the tucks, but the pattern also comes with a helpful cutting line if you want to skip them. I also made use of the fancy embroidery stitches on my machine, just because I could.
The only odd thing about this pattern was that the waistband seemed to be about 6" larger than I expected. As this is an underskirt, it ended up not mattering much, but I'm not sure what happened.


 |
| extreme waistband overlap |
 |
| tucks and fancy stitch |
No comments:
Post a Comment