Sunday, January 15, 2012

Ageless Patterns 1912 Evening Gown #1362 -- Update #1

And so it begins...
Last night I decided it was time to start sewing the muslin. I had just gotten Coco Before Chanel in the mail from Netflix and decided that it was just the inspiration I needed to get started. Man, oh man, what a gorgeous movie for costumes from this era. Almost all of the movie focuses on the 1910's. Also a beautiful story and excellent acting. I recommend it.

So in my last post, I said that I was a little concerned about the directions that come with the pattern. They are translations from the original French, but it also seems that some new lining pieces have been drafted to the original pattern numbers referenced in the instructions no longer apply, so I've been winging it.

I made up the lining pieces first because those need to be fit before anything else can be fit over them. Fine.

There are three bodice lining pieces: a front with two deep darts, a side back, and a back. All pretty straight forward. I pieced them together, but they do not even come close to meeting in the center front. I was expecting this at the waist, but I am a very close match at the bust.

oddly enough, the back pieces are an almost perfect fit.

I fretted for awhile. Then I read the directions again and found this:
"THE BODICE IS LINED WITH FIGURES 1-3 AND ONE APPLIES TO THE FRONT LINING PIECE IN EMBROIDERED SILK AND ONE SEWS THE SLEEVE SEAMS"

oooookay...

Then it occurs to me that the bodice front piece (#12) is cut straight (presumably to accomodate the edge design on the original edged tulle. Anyway, I think, I wonder if the lining opening is meant to match up with straight bodice piece.

Oh... so that's not going to work:


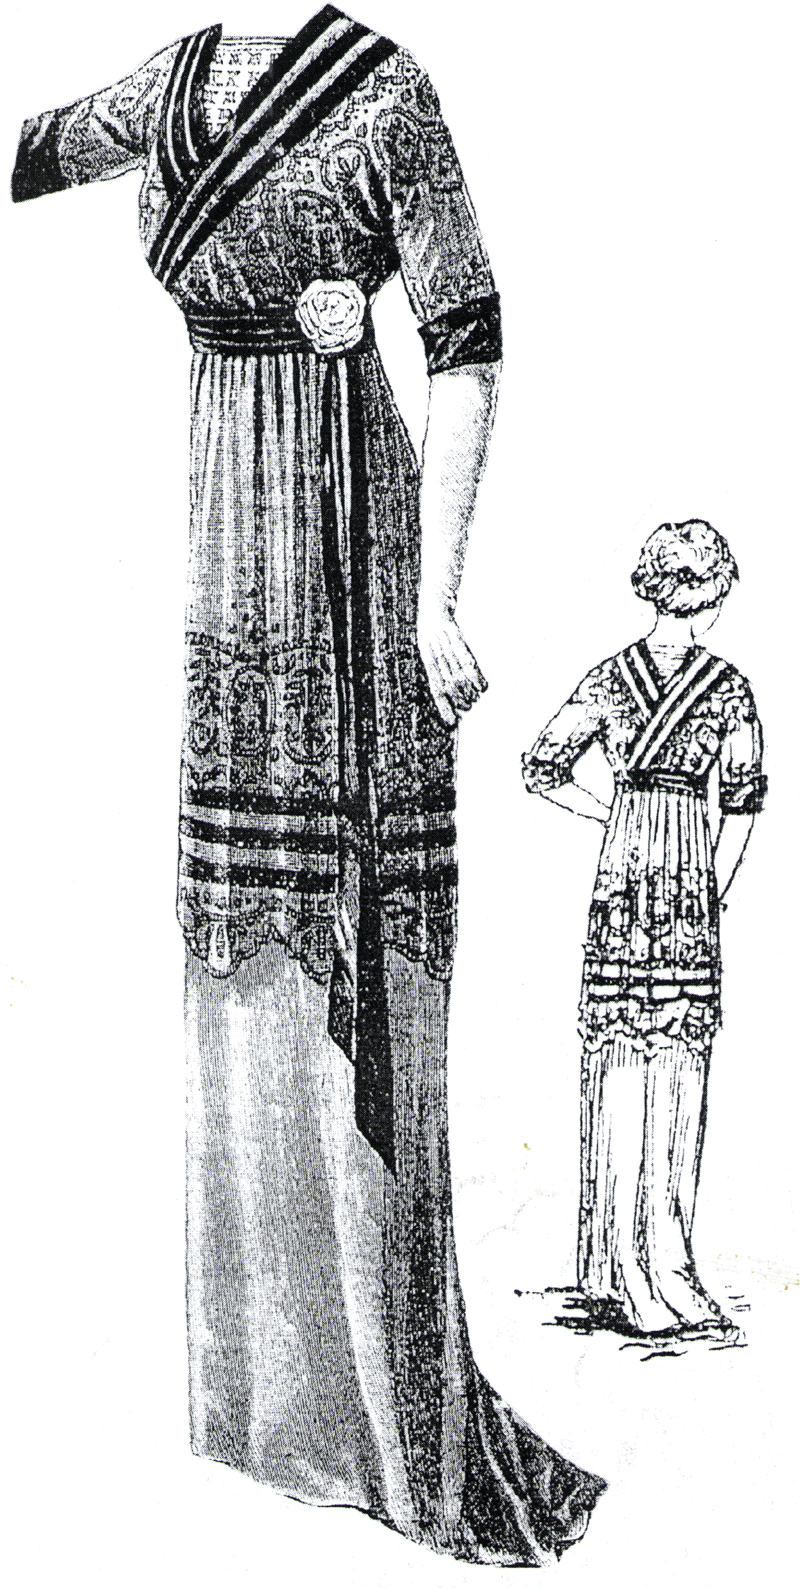
Then I start to wonder if I need to lining bodice at all. I mean, by the time one adds the lapels and the front and back "plastrons" (the triangles in the front and back), the bodice should be pretty well covered.

If those 4 pieces were lined with the golden georgette and the lining fabric, there shouldn't be any real concern in terms of coverage. Here's the lapel piece pinned on top of the bodice.


A final concern
So my last concern is that there is no clear indication about how to handle openings for this garment. There is a slit in the skirt at the back waist, but there is nothing in the pattern instructions about how to attach the cross-over bodice pieces to the skirt to accomodate the opening.

I think that the closure is going to have to be handled with snaps or buttons at the back waist. Remember that the whole high waist area is going to be covered with some kind of belt. That belt can be used to cover a multitude of sins, but may also require some engineering.

The new plan
My new plan it to make this without the bodice lining pieces. The more I think about it, the most I think that they were added later. It may well happen that I soon find out why they were added, but for now, I'm going to see how things go without them.

Here is how I think the original pattern pieces were labeled:
Current piece Original Piece
12 (bodice) 1
9 & 10 (plastrons) 2 & 3
7 (skirt back) 4
6 (skirt front) 5
11 (lapel) 6
13 (cuffs) 7
8 (over skirt) 8

The additional pieces ( 3 lining bodice pieces, 2 lining sleeve pieces, 1 bodice under sleeve) seem to have been added later.

Let's see how far I can get with just the original pieces.

Wednesday, January 11, 2012

Ageless Patterns 1912 Evening Gown #1362

The Wonder of Birthday Gifts
This year, for my birthday, my mother gave me the most exquisite hand-beaded trim. It came from my grandmother's stash, but it's likely that this trip actually came from my great-grandmother, Myrtle, who was a professional seamstress in LA in the 1930's. With that kind of provenance, I knew I would have to save it for the perfect project.


And then... the next gift I opened was a gift certificate to Haberman Fabrics which was right around the corner from my sister-in-law's, but very far away from my home. So clearly, a trip to the fabric store was a must. Then, there came an offer to cover the rest of my expenses on a project of my choosing. My mission was clear: I had to find a project that would allow me to spend my gift certificate and due justice to the trim.

I took an initial trip to the fabric store, and a plan was forming. I had recently watch the first season of Downton Abbey, and I was reminded how beautiful the clothes from the 1910's were. I realized that I couldn't just buy an approximate amount of fabric, I was unlikely to get back to Haberman any time in the near future. So, I went home and did a little pattern searching and found this lovely thing from Ageless Patterns:

I sketched out my idea for how to use a sheer overlay accented with the new trim, and was off to buy fabric.

The Fabric
After searching for 3 hours for exactly the right fabric (thanks to my DH, who is very, very good at that sort of thing), here's what I found. The under layer is a dark, golden wheat colored heavy silk georgette, which is transparent, so will need to be lined with a similar colored rayon lining fabric.

[transparent silk georgette under layer]

[rayon lining]

[transparency problem solved]

For the over layer, I chose a solid brown silk organza instead of an embroidered netting or tulle. I plan to use the trim as embellishment. I chose a golden colored silk organza for the triangular panels in the from and back, and I chose a warm dark brown silk charmeuse for the cuff trim, belting, trailing accents, and neck line accents. I may substitute some trim for the brown accents, but I'm going to want and see how things come together. Here is a picture of the fabrics layered appropriately with the trim:

The Pattern: Step 1 - Trace w/ wide seam allowances
This is a single sized pattern. As I have learned that my patterns always, always need some adjusting, I bit the bullet and started by tracing off the pattern onto another piece of tracing paper. I'll probable redraft parts of the several times, and I've found that it's really important to keep the original on hand and unmarked for reference. I always miss something!

The bust measurement is a good fit, but I will need to add at least 3" to the waist, so for the first muslin, I cut wide seam allowances. This means that I also need to trace all seam lines and major pattern marks so I can sew it together with all the uneven seam allowances.
[traced pattern]

[seam lines & waist line marked on fabric]

The only pattern issue I've found so far is that the skirt back pattern piece didn't quite fit onto my muslin, so I had to draft an addition (that piece is not shown)

Next Steps
The next thing for me to do is to get the under layer sewn together to I will be ready for our next craft day when I can get some help with pattern adjustments. I'm a little concerned about some construction details. I mean, click on the image below to get a larger version, then read these instructions. They're a hoot! To be fair, they are exactly as advertised: a direct translation of the original French directions that came with the pattern. I've worked with patterns like this before, but it may take a little work. I'll be sure to share any insights I get from this process.