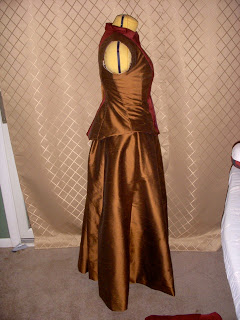
The view from the back looks pretty good:

But you can see from the side view, that I need to drop the waist and take in the back peplum area:
I pinned out some of the excess in the back and tightened up the waist (effectively moving the narrowest part of the back waist farther down).

It's a little hard to see in the photo because I had to pin out, but the fit was much improved.
Since I was going to redo the whole thing anyway, I decided to redraft the front to bring the contrast section a little more narrow and closer in line with the concept drawing. This means a narrower center front and a wider side front:

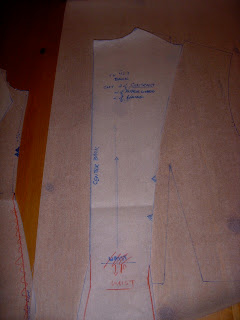
Those adjustments made, it was time to transfer the changes back to the pattern. Again. This time I want to focus on the armscye fit, so I decided to trace off my sloper so that I could cut it up into a more princess seam shape and see where that put the arm hole.
tracing the sloper:


D'oh! I forget to add a seam allowance at the neck edge (the sloper has no seam allowances). Maybe that is part of the reason the collar wasn't sitting right:

Narrowing the center bust & adding 1/2" to front opening (I want a little more wiggle room for the buttons).
And here's where all my troubles began
Seriously, you mean I have to read all the directions?

That's right friends, up until now I had been using 5/8" seam allowances on all muslins and the final version except where the instructions made a note about 1/2" seams. I bet if I could go back in time and start again with true 1/2" seams, most of my fitting problems might have resolved themselves. I have a brief moment where I thought that I might be able to just resew the current bodice, but then I remembered the clipped seams and the unfixable armscye.
Oh well.
I resolved to sew this muslin with 1/2" seam allowances and I expected things to be a little loose in the front, as I had transferred all the 1/8" seam increases I made as I was desperately trying to save the latest version. I saw how fast extra ease gotten eaten up with the lining and I'm going to add poly boning on this version, which will also add some bulk. I can take things in if it's still too loose in parts later.
muslin 2.0
Here is the latest muslin in ticking:
I now have a 1 1/2" overlap in the front. 1/2" will be seam allowance, leaving me with 1" instead of 1/2" for the buttons. I like having the extra room for now.
Tonight I will try tacking in some boning and trying it on my body. If nothing looks outrageous, I look at sleeves again.
Question: do we want to keep a burgundy collar or do we want to go with a bronze collar so that it is more visible?


1 comment:
A cautiously optimistic Hooray!
Maybe lay some brown where the collar would be to see if the contrast looks good, or if it looks kind of stripey?
Post a Comment