Muslin Test #2


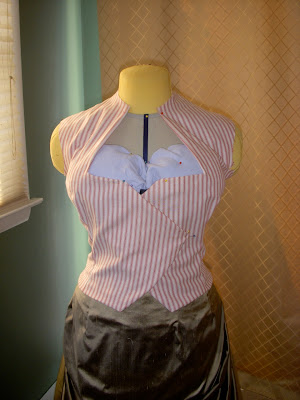

Joann's Red Tag Fabric selection was over priced and disappointing, so I went with ticking. It was $7/yard, but I had a 50% off coupon. I've decided that I really, really like ticking. It looks great and I need to remember it for the next time I want to use it for something steampunk-y. The fabric is an equivalent weight and hand to my fashion fabric. Here's how things are looking on the first dress form test:


I was really pleased, and then I turned under the hems and seams on the finished edges. I adjusted the hems until I like the lines I was getting.


Then I pinned on some buttons and ... squeee!

I was so excited, this is looking closer and closer to the design drawing.
I traced the desired finished edges. The original purpose of this muslin was to check the grain lines and the only piece that I really want to change is the side back. I'd like to get the bottom edges with the grain lines pointing more or less aligned, so I marked the change. Notice how I covered the skirts before marking, this occurred to me only after I just nearly missed permanently marking it.

I adjusted the sleeves by adding 3/8" to each cutting line at the armscye and blending that back to the regular cutting line at about the elbow.


The sleeve pattern & bodice patterns have no indications of the sleeve placement. This didn't bother me at first, but I attached the sleeves 3 times before I got them on right! You better believe I added those markings (front undersleeve, back undersleeve, and top of shoulder) once I was happy with the sleeve.
Then it was time to actually try the whole thing on. Luckily my DH was home to help me dress.


Overall, I was tremendously pleased with fit. A few thoughts right off the bat:
- the unfinished sleeves are right where I wanted the finished length, this leads me to believe that seam allowances were not added to the cuff edges. Should be an easy fix.
- the shoulders were too wide
- it doesn't show well in the photos, but the upper back was creasing up around the neck line
The result isn't perfect, but I think this is going to be the easiest pattern adjustment. We marked the center back and the new collar line and should lines.

>

With the final changes made to this muslin, I changed and put the corset and skirts back on the dress form. Then I took the muslin apart and traced these changes back on the pattern.


You can see that back neck needed to come up about 1.5", not including the seam allowance. These adjustments mean that it's probably a good idea to drop the armscye a little bit more.


I think I need one more muslin to try out the final adjustments and do a full test (add lining to the front, do a full collar, cuffs, and lapels. If I'm happy with that version, that I can see if the blouse front pattern still works and I can work out the overlap for the buttons. If I'm feeling frisky, I can try to work out the pre-pleated fabric.
1 comment:
Wow, I love your inspiration picture! It looks like you have a pretty good fit!
Post a Comment