I purchased switches from
Wilshire Wigs, but I was disappointed by the color match. I realized that I was fighting an uphill battle trying to guess at the right color, so I decided to make my own. I was able to use the switches I bought as a guideline. I went to my local wig and braiding store to find weaving hair that would be a better blend.
Update 2/25/13: Lynn McMasters has an alternate version of how to do this that involves using a sewing machine. The article, "The Makings of a Natural Form Era Hairstyle" can be found under the "Articles" section of her website:
lynnmcmasters.com
Here is my attempt at step-by-step documentation of my process. Enjoy!
 |
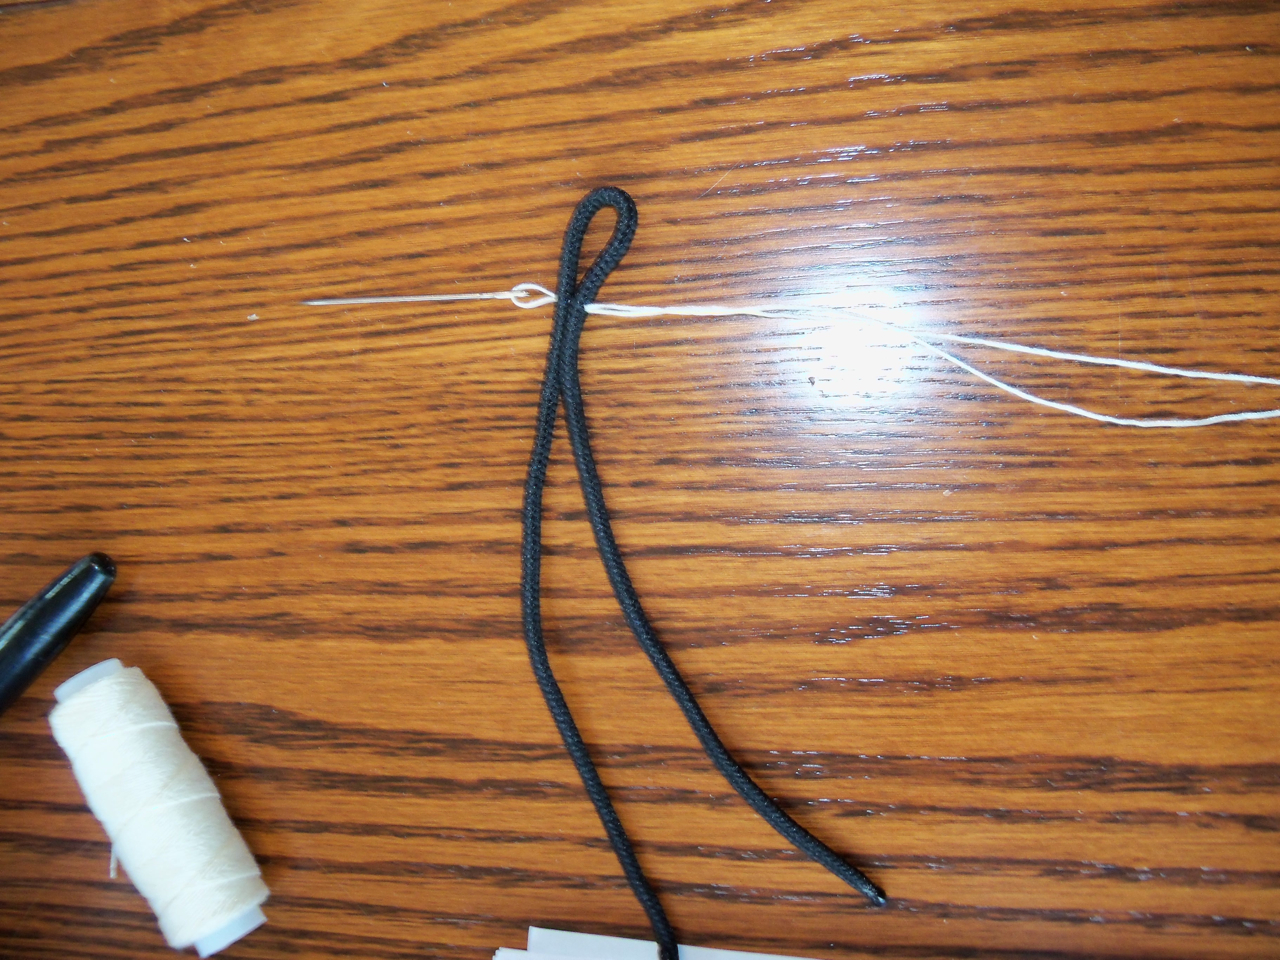
| Start with a sturdy, non-stretch cord. I used boot laces. I used a piece about 10 - 11" long. Create a loop about 1" long, then sew the loop closed by running the thread through both laces. |
 |
| Wrap the thread around the laces 5 or 6 times. Then, tie it off securely. |
 |
| I wanted to make a long switch, so I bought the longest hair I could find in my color (30"). |
 |
| Get ready to start attaching the hair to the cord. |
 |
| You are going to roll the hair around the cord and sew through the cord to attach the hair. |
 |
| The sew at regular intervals. |
 |
| Keep the spirals close together, overlapping a little. |
 |
| I used the back of the chair to keep the developing switch from getting tangled with the loose hair. |
 |
| I moved 2" sections of hair over the back of the chair at a time. This seemed to be a good amount to keep things somewhat tidy. |
 |
| As you get about 2" from the loop closure, start spreading the spiral out so that the end of the switch won't be too bulky. |
 |
| One half done! Brush this out before doing the same thing to the second cord. |
 |
| 2nd cord done! Brush these halves out separately. |
 |
| At this point, I think you could probably sew in a third cord, if you want a thicker switch. |
 |
| In fact, you could probably loop another piece of cord through the first loop and secure it like the original loop. |
 |
| Once all the pieces are done, brush all the cords together. |
 |
| Start sewing hair around both cords just above the existing hair. |
 |
| Occasionally, sew through both cords. |
 |
| Sew the hair up to the beginning of the loop. |
 |
| If you have extra hair, start wrapping hair again around both cords. |
 |
| Make sure everything is secure. Then wrap the thread around the hair about 1/4" below the top level of the hair. (I forgot to take a picture of this last step.) |
 |
| You can kind of see the thread wrapping around the outside of the switch in this shot. I created a second switch, then twisted both of them into rope braids. |
 |
| Then, with a little help from my talented friends, BOOM! instant hair! |


3 comments:
Brilliant! I'd just read the Your Wardrobe Unlock'd article, too, and wondered how to make a switch, and lo, you'd done!
Fabulous. I have the hair, thread and needle, now just need boot laces.
Thanks so much,
Natalie
Incredibly helpful - many thanks for this tutorial! :)
I just found this tutorial. Awesome. Do you have any advice if I was starting with hair that is not sewn together?
Post a Comment