This year, for my birthday, my mother gave me the most exquisite hand-beaded trim. It came from my grandmother's stash, but it's likely that this trip actually came from my great-grandmother, Myrtle, who was a professional seamstress in LA in the 1930's. With that kind of provenance, I knew I would have to save it for the perfect project.
And then... the next gift I opened was a gift certificate to Haberman Fabrics which was right around the corner from my sister-in-law's, but very far away from my home. So clearly, a trip to the fabric store was a must. Then, there came an offer to cover the rest of my expenses on a project of my choosing. My mission was clear: I had to find a project that would allow me to spend my gift certificate and due justice to the trim.
I took an initial trip to the fabric store, and a plan was forming. I had recently watch the first season of Downton Abbey, and I was reminded how beautiful the clothes from the 1910's were. I realized that I couldn't just buy an approximate amount of fabric, I was unlikely to get back to Haberman any time in the near future. So, I went home and did a little pattern searching and found this lovely thing from Ageless Patterns:
I sketched out my idea for how to use a sheer overlay accented with the new trim, and was off to buy fabric.
The Fabric
After searching for 3 hours for exactly the right fabric (thanks to my DH, who is very, very good at that sort of thing), here's what I found. The under layer is a dark, golden wheat colored heavy silk georgette, which is transparent, so will need to be lined with a similar colored rayon lining fabric.
[transparent silk georgette under layer]
[rayon lining]
[transparency problem solved]
For the over layer, I chose a solid brown silk organza instead of an embroidered netting or tulle. I plan to use the trim as embellishment. I chose a golden colored silk organza for the triangular panels in the from and back, and I chose a warm dark brown silk charmeuse for the cuff trim, belting, trailing accents, and neck line accents. I may substitute some trim for the brown accents, but I'm going to want and see how things come together. Here is a picture of the fabrics layered appropriately with the trim:
The Pattern: Step 1 - Trace w/ wide seam allowances
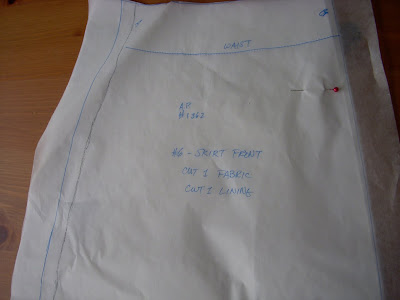
This is a single sized pattern. As I have learned that my patterns always, always need some adjusting, I bit the bullet and started by tracing off the pattern onto another piece of tracing paper. I'll probable redraft parts of the several times, and I've found that it's really important to keep the original on hand and unmarked for reference. I always miss something!
The bust measurement is a good fit, but I will need to add at least 3" to the waist, so for the first muslin, I cut wide seam allowances. This means that I also need to trace all seam lines and major pattern marks so I can sew it together with all the uneven seam allowances.
[traced pattern]
[seam lines & waist line marked on fabric]
The only pattern issue I've found so far is that the skirt back pattern piece didn't quite fit onto my muslin, so I had to draft an addition (that piece is not shown)
Next Steps
The next thing for me to do is to get the under layer sewn together to I will be ready for our next craft day when I can get some help with pattern adjustments. I'm a little concerned about some construction details. I mean, click on the image below to get a larger version, then read these instructions. They're a hoot! To be fair, they are exactly as advertised: a direct translation of the original French directions that came with the pattern. I've worked with patterns like this before, but it may take a little work. I'll be sure to share any insights I get from this process.


1 comment:
WOW! These are amazing! I'm reading from the current home page back through the archives and I'm so impressed. My dissertation research is on Gilded Age fashion and Amerrican literature, so I've done a lot of book research into this stuff--but seeing it being made up is such a different animal!! I'm a beginning sewer myself (thought I should have some hands-on experience with the process), o I'm triply impressed, especially with your skills in pattern adjustment and drafting. PLEASE keep posting! What an education!
Post a Comment