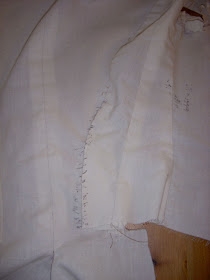
OK, here's what the new pattern is looking like and how it got that way:
Step 1: mark the new seam line between back and side back by crosshatching with a marker.

Unfold and, voila!, new seam lines appear.

Then I went to work on the front pattern piece. This is where the bulk of the adjustments were made.
Step 2) Adjust the armscye. It occurred to me that clipping the arm hole open made for a good fit, but I had marked where I wanted the seam. I needed to add back the seam allowance so that I didn't over enlarge the armscye.

Step 3) Join the two front pieces (front and front extension) together to make a single piece. (I may regret this later in the pattern layout stage, but right now it makes sense). I also moved the straight across section of the neck opening over 2 5/8" so that I should get a 2 1/2" gap at the top on the finished piece.

Step 4) extend the bottom piece to (hopefully) match the top opening. I also added 1 1/4" to the bottom edge of all pieces to allow for a hem and/or adjustments to the final length. I also added the 1/8" to the side that joins the side front as planned.

Step 5) redraft the side back. You can see in these photos how I traced the changes from the muslin onto the original pattern piece and then created a new pattern piece by tracing and adjusting the old one.


Step 6) redraft the back pattern piece. I added 1/4" to the back seam and then realized that the back seam was getting pretty far off grain. I shifted the new curved seam and the lower half of the center back over 1/4". I decided to remove the back "flap" and see what that looks like. I'm not sure it's helping the bodice, especially since I want to show off the fancy overskirt.


Step 4) extend the bottom piece to (hopefully) match the top opening. I also added 1 1/4" to the bottom edge of all pieces to allow for a hem and/or adjustments to the final length. I also added the 1/8" to the side that joins the side front as planned.

Step 5) redraft the side back. You can see in these photos how I traced the changes from the muslin onto the original pattern piece and then created a new pattern piece by tracing and adjusting the old one.


Step 6) redraft the back pattern piece. I added 1/4" to the back seam and then realized that the back seam was getting pretty far off grain. I shifted the new curved seam and the lower half of the center back over 1/4". I decided to remove the back "flap" and see what that looks like. I'm not sure it's helping the bodice, especially since I want to show off the fancy overskirt.

The side front, I apparently forgot the photograph, but the adjustments were similar. I made minor change to the armscye, added l/8" to the side that joins the front piece, and added 1 1/4" to the bottom edge.
Possibly tomorrow I will make another muslin.
No comments:
Post a Comment