


Monday, May 23, 2011
TV 423 two-Tones bodice Air Hostess Final images
I just returned for a very successful Steampunk World's Faire. The outfits were a great success. WE entered the costume contest and took special mention for best presentation. the group looked great and our props totally sold costume. Enjoy!


Tuesday, May 3, 2011
TV 423 Two-Toned Bodice (Airship hostess) Part 9 -- COMPLETED!
So the beast is finally done! Here are the last few steps, wherein I do as many things backwards as possible.

Sleeves
I decided to interline the sleeves with my ticking, but not to line them because I didn't want the armscye to get overcrowded. This meant that I have to catchstitch the seam allowances and use bias tape to enclose the cuff seam.

This was a lot of tedious hand sewing, but I finally got that done over two nights.
only to discover that I had put one of the cuffs on backwards...


ARGH!!!!
I took one cuff off and reattached it and things were back to normal. Then I set the sleeves. Even after all the fiddling I did, I still felt that the armscye was uncomfortably tight. I was ready to "rage quit" this project, but William suggested that I leave it on the dressform to stretch out for a few days. That helped a lot. The arms aren't perfect, but I should be able to wear this for a few hours at a time now.
Buttons
I marked out the buttonhole spacing and put the buttonholes in all 1/2" from the left opening. I haven't checked yet, but I'm pretty sure that the holes were supposed to go on the righthand side. Oh well! As long as the other air hostesses do the same, we will match.
I also knew that I was going to need to use the button placement to do my last fitting tweaks, so I tested the button placement using safety pins. I thought this was rather clever. (NB: the 1/2" ball buttons needed the same opening as a 5/8" flat button)


Then I sewed the buttons on...


All finished!
And it's done. I tacked the patch onto the left sleeve and we're good to go. More full-costume images to come in a few weeks!


Friday, April 15, 2011
TV 423 Two-Toned Bodice (Airship hostess) Part 8
I tried on muslin 2.0 to check the fit. There is a lot more ease, but I wanted to test the fit with and without boning. I think I'm going to need most of this ease to accommodate the three layers + boning.
Front fit looks OK:
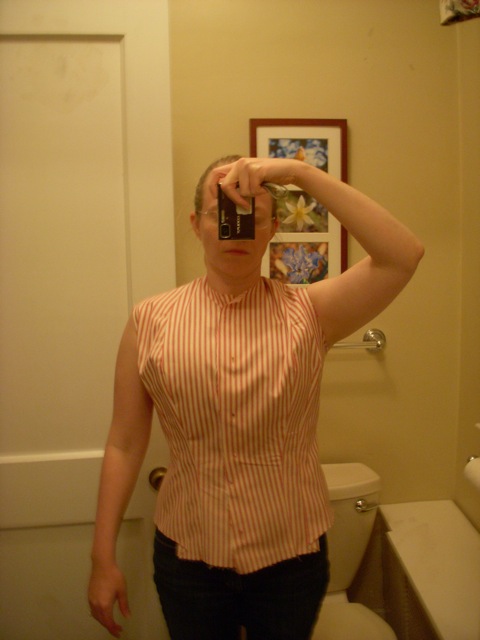
But there seems to be waaaaay too much room in the back peplum:


I did my best to pin out the excess between the side and side back pieces:


and rechecked the fit. things are looking better!


Then I pinned in the boning and called it a night:


Yesterday, I was in the DC area and I was lucky enough to be able to meet up with the other two air hostesses, Eugenia and Tracy (who, by the way, had a much better time with their initial fittings than I did). Eugenia helped me redistribute the back peplum more evenly and then we turned our attention to figuring out the sleeve.
Sleeve notes
The sleeve is designed to have a front side (the larger piece called the "outer sleeve") and a back side (the smaller piece called inner sleeve) rather than a more traditional top side and bottom side. The front or outer side is the sleeve piece that is most visible when you look at the garment from the front. The inner sleeve still sits mostly on the under side of the arm, but about 1/2 of the piece is visible from the back view of the garment.
To add to the confusion, the pattern pieces appear to have been printed in a non-standard way. I am used the to idea that, unless otherwise indicated, the pattern piece is printed from the righthand side view. You lay the pattern down over the front side of your fabric and if you only cut one layer, you have cut out the righthand side of that pattern piece.
There were not layout instructions with this pattern, so there was no indication I should expect anything different from this pattern. On closer inspection; however, it became obvious that one of the two sleeve pieces must have been printed from the lefthand side perspective. After about 15 minutes of thinking about it, we decided that the outer sleeve was printed from the lefthand perspective:


and that the inner sleeve was printed from the standard, righthand perspective:


This may have contributed to the rotation issues I had the first time I made the sleeve. I cut the muslin and Tracy was kind enough to help me pin fit it:


This is a much more natural fit then my first attempt. Hooray!
I noticed that the last fitting issue seemed to be som extra room in the side front piece. It turned out that both Tracy and Eugenia had had to make minor adjustments in the same area. Tracy pinned out the excess and I think I will be able to just fold this little extra out of the pattern and not have to rotate it into the seam, but we'll see when I take this apart.


I am feeling so much better about this project now. I think I'm ready to make changes to the pattern and start cutting out for the final version either today or Sunday.
Wednesday, April 13, 2011
TV 423 Two-Toned Bodice (Airship hostess) Part 7 "A New Hope"
Now that I completed the skirt, it was time to face the music again. I knew that the armscye needed lots of adjustments, but I put the bodice back on the dress form to see if there was anything I wanted to change since I was not committed to a complete redo from the pattern up.
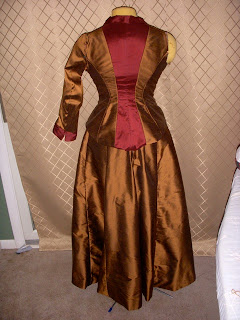
But you can see from the side view, that I need to drop the waist and take in the back peplum area: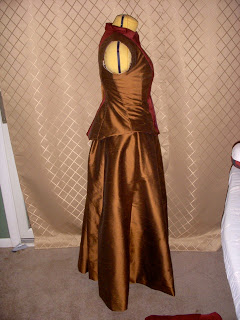

It's a little hard to see in the photo because I had to pin out, but the fit was much improved.
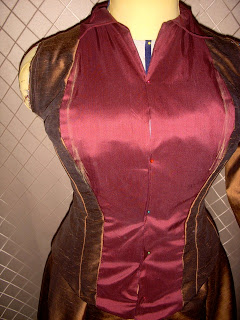

Deciding how much to drop the waist:


The view from the back looks pretty good:

But you can see from the side view, that I need to drop the waist and take in the back peplum area:

I pinned out some of the excess in the back and tightened up the waist (effectively moving the narrowest part of the back waist farther down).

It's a little hard to see in the photo because I had to pin out, but the fit was much improved.
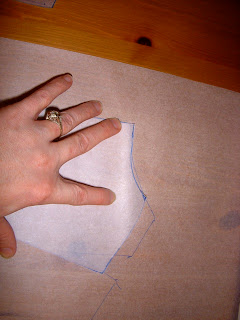
Since I was going to redo the whole thing anyway, I decided to redraft the front to bring the contrast section a little more narrow and closer in line with the concept drawing. This means a narrower center front and a wider side front:

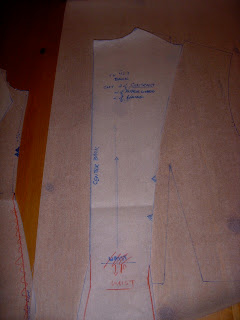
Those adjustments made, it was time to transfer the changes back to the pattern. Again. This time I want to focus on the armscye fit, so I decided to trace off my sloper so that I could cut it up into a more princess seam shape and see where that put the arm hole.
tracing the sloper:


D'oh! I forget to add a seam allowance at the neck edge (the sloper has no seam allowances). Maybe that is part of the reason the collar wasn't sitting right:


Narrowing the center bust & adding 1/2" to front opening (I want a little more wiggle room for the buttons).

And here's where all my troubles began
Seriously, you mean I have to read all the directions?

That's right friends, up until now I had been using 5/8" seam allowances on all muslins and the final version except where the instructions made a note about 1/2" seams. I bet if I could go back in time and start again with true 1/2" seams, most of my fitting problems might have resolved themselves. I have a brief moment where I thought that I might be able to just resew the current bodice, but then I remembered the clipped seams and the unfixable armscye.
Oh well.
I resolved to sew this muslin with 1/2" seam allowances and I expected things to be a little loose in the front, as I had transferred all the 1/8" seam increases I made as I was desperately trying to save the latest version. I saw how fast extra ease gotten eaten up with the lining and I'm going to add poly boning on this version, which will also add some bulk. I can take things in if it's still too loose in parts later.
muslin 2.0
Here is the latest muslin in ticking:


The side view reveals the extra room at the front. Some of these seams are now adding in 1/2" instead of 1/4" because I added the extra 1/8" to the cutting line before I realized that I would sew 1/2" seams instead of 5/8" seams. I'm sure some of this will come back out later.

I now have a 1 1/2" overlap in the front. 1/2" will be seam allowance, leaving me with 1" instead of 1/2" for the buttons. I like having the extra room for now.
Tonight I will try tacking in some boning and trying it on my body. If nothing looks outrageous, I look at sleeves again.
Question: do we want to keep a burgundy collar or do we want to go with a bronze collar so that it is more visible?
Tuesday, April 12, 2011
TV 291 Walking Skirt for Airship Hostess
As promised, here is my quick review of the skirt for the air hostess costume. We are using Truly Victorian's Walking Skirt pattern (TV 291). It went together very easily. I made the MED size for the 26" - 28" waist range. I widened the placket piece and made the waistband 2" longer, as per the suggestion in the instructions. I like to have extra flexibility in costume pieces.

There was nothing tricky about this. I used a 2" seam allowance at the bottom hem to shorten the length just a little for more comfortable walking and so I could show off whatever saucy shoes I end up buying to go with this.
The only strange outcome seems to be that the waist circumference is much smaller than I expected. You can see here that the back doesn't quite match, but the waist is the right measurement. Huh. I'm glad I put in the extra wide placket and longer waistband.


Here are more shots and the finished skirt:


I to give you some idea what the final piece will look like:

I think we should add some of the burgundy to the skirt somewhere. I think we might all have enough to make some kind or trim. I think I got the bulk of the extra fabric, so we can spread it around.
Monday, April 11, 2011
TV 423 Two-Toned Bodice (Airship hostess) Part 6
Oh such sadness!


 Notice how my back sleeve seam meets the side back seam, whereas in the design drawing, the sleeve seam is much higher up.
Yesterday I went back to the bodice to attempt the fit the sleeves and finished that part off. I think I solved to rotation issue nicely, but I soon began to see that I had cut the armscye back to where the seam should be at the top of the shoulder.
I should have spotted this earlier, I now realize. Back in part 3, I had a pattern mismatch scare. I need now that I should have recut the side back them and there.
But no! Then, I cut what remained of the lower front armsyce seam allowance out, thinking that this would improve the fit.
Unknowingly, that left no seam allowance. I did get the sleeve pinned on successfully, which gave me hope, but when I took it off and looked inside, I had pinned the sleeve to the last 1/16" of the armscye. I tried moving it up, but the shoulder width was getting uncomfortably narrow.
It was time to face facts: I will probably have to rip this apart and recut all of the bronze regions: the side back, side, and side front. At this point, I might even decide to remake the whole thing.
balls.
Before I could even consider this option, I needed to know if I would even have enough of the bronze fabric to do this. Also, I really needed a taste of success again.
I laid out the pieces for the skirt pattern (TV 291: Walking Skirt) and it turns out I should have plenty of fabric left over for a complete remake. I spent the rest of yesterday making the skirt because I just couldn't face the bodice. I got all but the last of the hand sewing done. I should have pictures and a review of the pattern up by tomorrow.
Here is a list of proposed changes and approaches to TV423 bodice 2.0:
1. No linings, only facings. Adding the lining seems to bee the source of many fitting problems in the lower rib cage area, so I can see no real need for it in a costume piece. I'm also going to be wearing this for the first time in late May in New Jersey, so I should be plenty warm without it. Facing things should allow this tightly fit garment to flex a little more as needed.
2. Consider moving the back waist down about 1". It appears to have crept up when I adjusted the shoulder angle.
3. redraft the armscye using my sloper as a guide and then, and this is key, remember to leave seam allowances.
4. test the fitting changes with a muslin made out of the ticking fabric I bought for my last project. Once everything is fit, I might be able to use this as the interlining. (Fitting note: watch the ease!)
5. use the sleeve pattern as only a rough guide. Test fit and redraft the pattern from the muslin. After I finished adjusting the sleeves yesterday, the rotation was very far from the concept drawing.
6. Consider boning with poly boning. Once this has wearing ease, the waist might need some light boning to maintain smooth curves at the waist.
7. Check the fit of the back hip. Right now I've got a cute peplum look, but the design drawing has the back lying smooth. I may have to take in the back hip to get a smooth fit. I won't be wearing a bustle with this.
I'm going to try to keep my cool with this. I have two other air hostesses who are expected to do this pattern with me. However, if I can't get this successfully fit, I might request a different bodice pattern for the costume. I'm almost at my limit with this one.
Subscribe to:
Posts (Atom)